
What
Summary: this post will show how an Out-Of-The-Box Microsoft Flow in Office365 can send one email with a dynamic number of attachments while these attachments are stored in one or more SharePoint Online libraries.
Why
First of all let me take a moment to point out that if you have SharePoint Online --> why do you want to send an e-mail with attachment(s)??!! SharePoint stores the documents in a safe place, with version history (if enabled) and you, your colleagues and even external users (if enabled) can co-work on documents simultaneously!!
If you are working for an organization that cannot convince business owners that SharePoint in 99% of the cases does not need documents to be emailed as attachments and you really, really, really tried to show them why, let me know! I'll see if we can arrange a job interview with Portiva #BestPlaceToWork
The other 1% could be a scenario like I had: the HR department of a big organization has a sub-department of more than 10 persons that send out packages to new colleagues weekly with a number of forms that need to be completed and sent back with a lot of accompanying documentation. Because of the big number of forms (from different sources), accompanying documentation, sub-processes and the variety of packages based on the job position --> automating these packages by e-mailing these to external e-mail addresses would be a quick win. Believe me: I really, really, really tried to convince them that other options would be a bigger win but with some customers you have to "pick your battles".
How
It is important to show credits to the persons that started this journey and these posts will help in understanding the instructions below:
- Sunay Vaishnav that started a post: https://flow.microsoft.com/en-us/blog/multiple-attachments-single-email/
- Vytenis Jazbutis who corrected the post in the comments
(TIP: always read the comments first when facing issues!)
I used this post and its comments to make these instructions and some steps are really important (not user friendly in Microsoft Flow yet) to follow to the letter.
We need the following before starting the flow:
- A document library (could also be a list item) that triggers the Flow:

- If you need to sent a selection of attachments, we need information on which we can filter all possible attachment(s). In my example I added a Choice Column that would contain the job position so depending on the selected job position, one would receive a specific set of attachments.
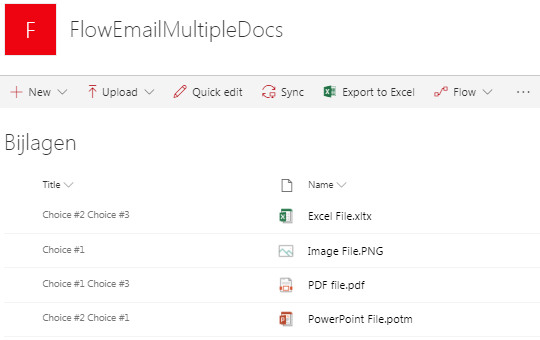
- A document library that contains the to-be-sent attachments:

- I used the Title column (but could be any other column off course) to determine which attachment belongs to which choice in the document library that starts the flow. These are simple text values (strings) that match the (exact same) values of the first document library choice column.
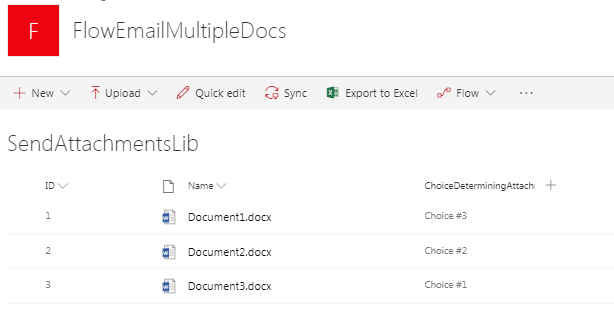
1. Create a flow that triggers in the way that you want. In my case I created a flow that triggered on When a file is created or modified from the first document library.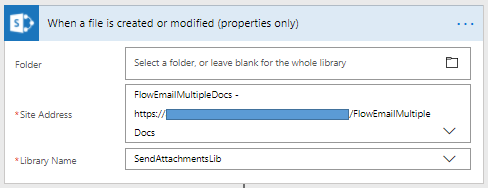
2. Then a step that gets all the possible attachments from the library where the to-be-sent attachments are stored (and kept up-to-date by the business). The Get files (properties only) step: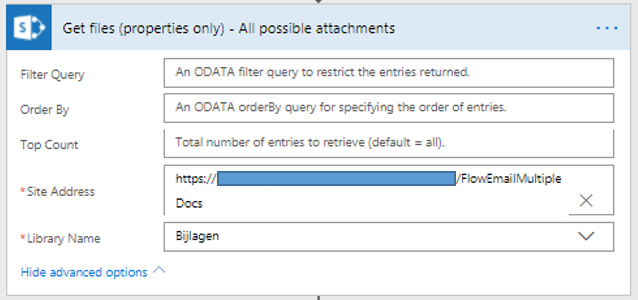
- TIP: give each step a unique name before continuing to next steps because once a previous step is used in another step you cannot rename it. Unique step names will help in identifying the correct variable in bigger flows.
- This step gets all the possible attachments because I filter the needed attachments in a next step. If you have a big number of files in this document library it would be wise to limit the number of results by adding a Filter Query in the ODATA syntax (there are plenty of blog posts about that option).
3. Before we use the output of previous steps an Initialize variable step is added: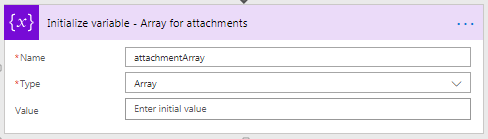
- Initializing variable steps need to be in the main stream of the flow and this variable will be a big part of the multiple-attachments-magic.
4. Now it gets interesting! After the step of getting all the files from the library we need to filter out the document(s) we want. You can start by adding a simple Condition step using the Title column of the attachment library: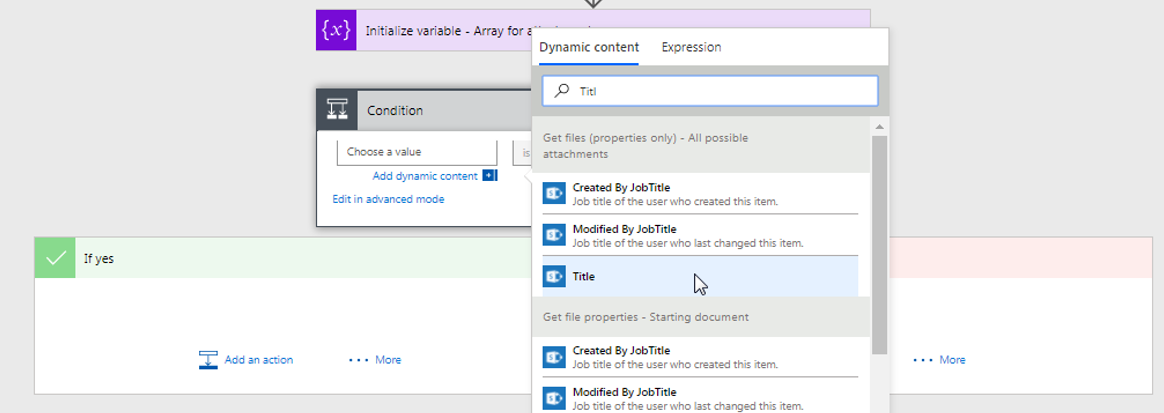
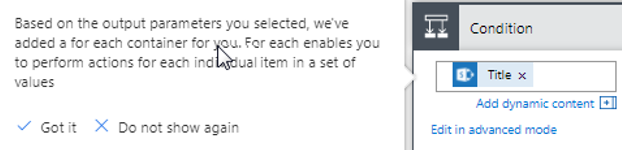
- Luckily for us Microsoft Flow knows that we are using a step that gets multiple files so it automatically helps us:
- Now the step is changed to:
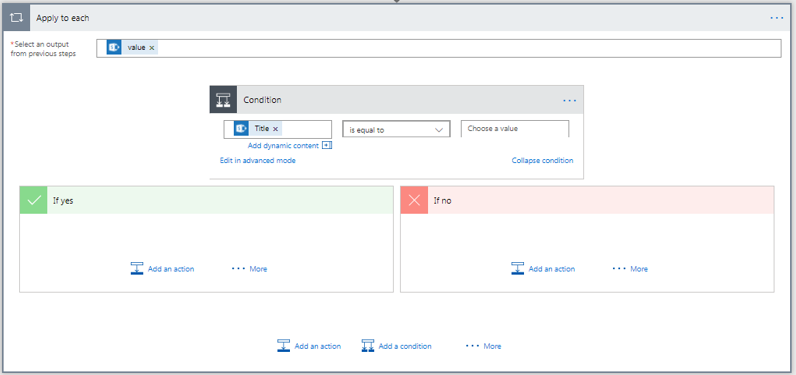
- TIP: whenever you see a variable (like value or Title in the screenshot above) you can copy it and when you paste it into Notepad (or any other non-formatting application) the real "code" appears. Understanding this and practicing with the codes will create a new world of possibilities:
- value = @body('Get_files_(properties_only)')?['value']
- Title = @items('Apply_to_each')?['Title']
5. Because we want to filter the documents that only have a Title containing the value of the Choice selected in the document of the library that starts the flow, we can select the Value of the Choice Column: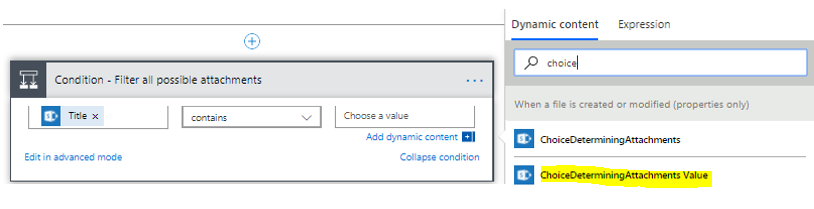
- This results in the right part of the condition: @triggerBody()?['ChoiceDeterminingAttachments']?['Value']
- TIP: use the search function when looking for Dynamic content because in some flows the number of variables can increase quickly.
- TIP: check out what these basic expressions looks like in advanced mode = @contains(items('Apply_to_each_-_All_possible_attachments')?['Title'], triggerBody()?['ChoiceDeterminingAttachments']?['Value'])
6. The first step to add in the If yes section of the Condition will be to get the content of the file. Because this is resided within an Apply to each step --> it will apply to each retrieved file that fits the condition above.
- I used the Identifier of the Get files step and Flow changed it to: @items('Apply_to_each_-_All_possible_attachments')?['{Identifier}']
7. The second step to add in the If yes section of the Condition will be to get the metadata of the file.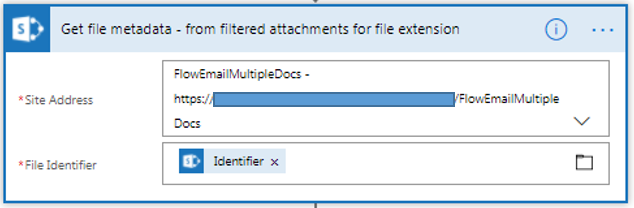
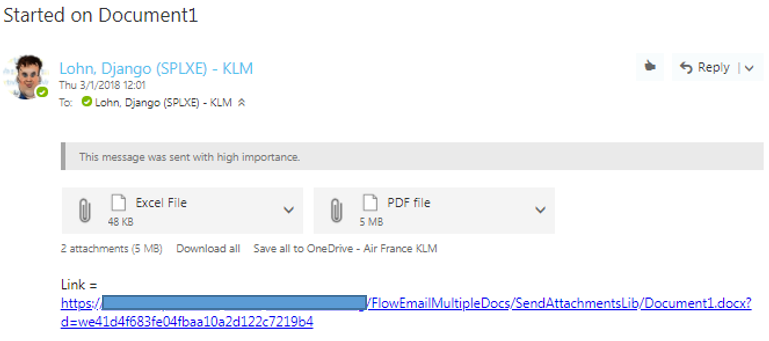
- This is needed to get the extension of the file. I once had a flow that showed the FileNameExtension as a variable within the trigger step, but somehow this has disappeared. We need the name including extension because otherwise the attachment is sent without extension and the e-mail application does not know which application to use on which attachment; see the e-mail below with unknown-file-type icons:
8. The third step to add in the If yes section of the Condition will be the last part of the attachment magic. It is an append to array step and because it is in the Apply for each section it will add the code for every attachment to add. We really need to pay attention because this can be confusing. The end result will be: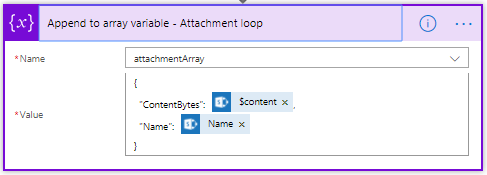
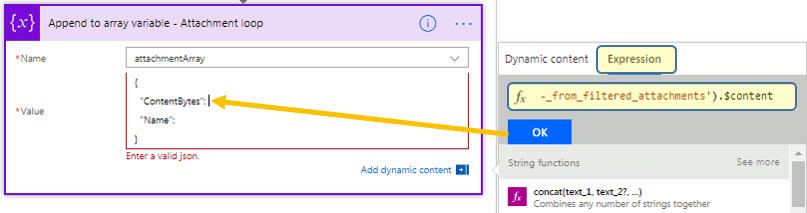
- Because the $content part is not any selectable variable we start by adding the JSON part that has no variables:
{
"ContentBytes": ,
"Name":
}
- Some JSON knowledge will come in handy. Please pay attention to all the accolades, comma's and quotes. (quotes copied and pasted may need to be replaced by the correct type of quotes. Flow will show a message: "Enter a valid json.")
- Then we add the ContentBytes part that will be the content of the document. We need to use information from the Get file content step above (number 6) and combine it with a string (.$content) to get the desired output. Depending on how you named that step we need to add the following information as an expression:
body('Get_file_content_-_from_filtered_attachments').$content
- Note that you need to add it as an Expression using the exact naming of the Get file content step (where spaces are replaced by underscores / _ ). After you add it as an expression it will show as an expression but do not worry, because after you save the flow it will be changed to the $content variable.
- Extra explanation about adding the ContentBytes as an Expression =[embed]https://youtu.be/Bncu6o3phes[/embed]
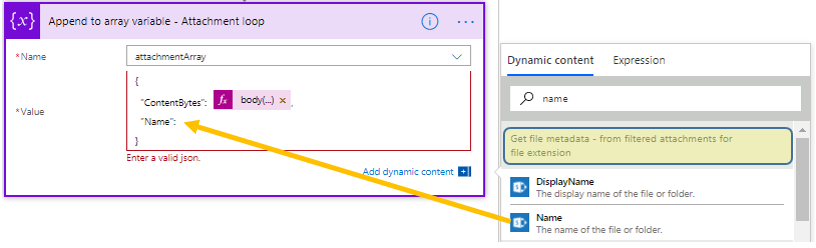
- At last we add the Name part that will be the name of the document including the file extension:

- Note to use the Get file metadata step (until a better option like the variable FileNameWithExtension will be available).
- The end result when you copy the contents and paste it into Notepad:
{
"ContentBytes": @{body('Get_file_content_-_from_filtered_attachments')['$content']},
"Name": @{body('Get_file_metadata_-_from_filtered_attachments_for_file_extension')?['Name']}
}
1. And last but not least we can add a Send an email step where we can use the array variable: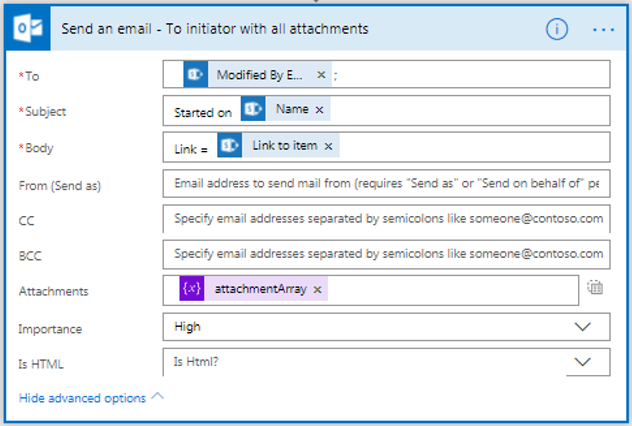
- Note that you collapse the Attachment part and then add the array variable because the array contains both content and name.
2. After we add/edit a document in the triggering library the result will be: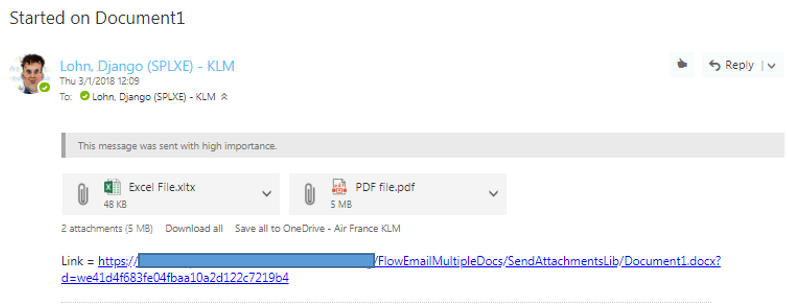
I know this seems a lot of work and maybe even too complicated but until this will be supported with default steps, this could be an out-of-the-box option that anyone can create!

