
Azure Functions is a serverless solution for running small pieces of code ("functions") in the Microsoft Azure cloud. The code can be written in the Azure Portal self (extensions for Visual Studio are still in preview now) without the need to worry about the hosting infrastructure at all.
Azure Key Vault is the Azure cloud-hosted service for managing cryptographic keys and secrets.
The situation: In our projects, we must have a mechanism to maintain safely and in a centralized way, login and passwords, needed to integrate with other systems. The Azure Key Vault is the ideal service to do that, but, unfortunately, accessing natively the Azure Key Vault from Azure Functions is not yet available.
Using scenarios: To integrate different systems and to create custom functionality in SharePoint Office 365, we are using continuously Azure Functions. Therefore, we need to have a centralized, safe and encrypted repository for the login credentials of the different systems and, eventually, of SharePoint self.
The solution: It is still possible to recover Key Vault Secretes using the standard .NET framework and the Key Vault libraries.
Register the application in Azure Active Directory
Each application that wants to use the Key Vault must be "known" by Azure. The registration should be implemented in the Azure Active Directory. When an application tries to recover a key from the Vault, it retrieves an OAuth token from the registration and use it for authentication in the Vault.
01 - Login in the Azure Portal and go to the Azure AD Service. Microsoft offers 30 days trial Tenants from the Azure Portal self (https://portal.azure.com) if you don't have one.
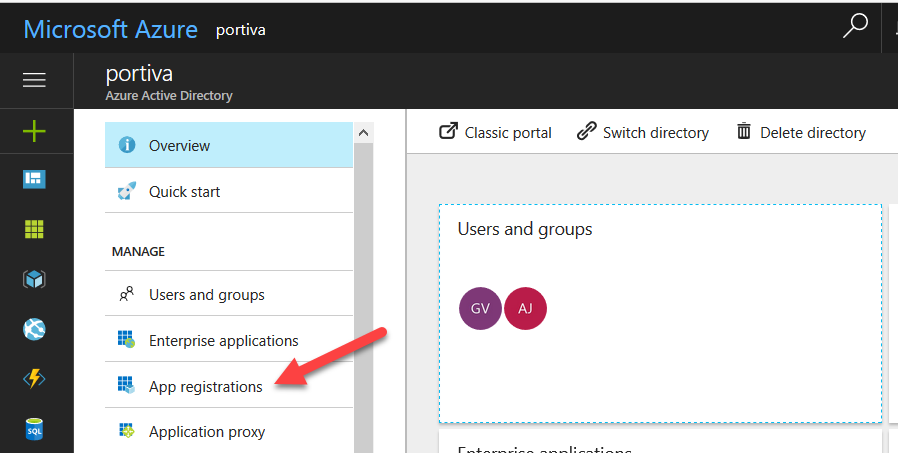
02 - Click on "App registrations". The list with current registrations is shown. Use the button "+ New application registration"
03 - Assign a name to the registration ("BlogSecretsAppRegistration" in the example), select "Web app / API" in the "Application type" and use any kind of URL in "Sign-on URL". This URL is not further used and it doesn't have to be a real, functional URL. If required, it can be changed later as well.

04 - After creation, click on the name of the registration in the list of registrations and review the "Overview" panel

05 - Save temporary the "Application ID" value, it will be used later as the ClientID ("33b6cafa-64da-4ca8-8d54-ee349a16e7c5" in the example)
06 - From the App registration menu, click on "Keys". Create a new key filling de data in the required fields: define a "Description" (any kind of string), select "Never expires" in "Expires" and use the "Save" button. Copy the generated "Value" because it will be necessary later, and it is impossible to retrieve it again.
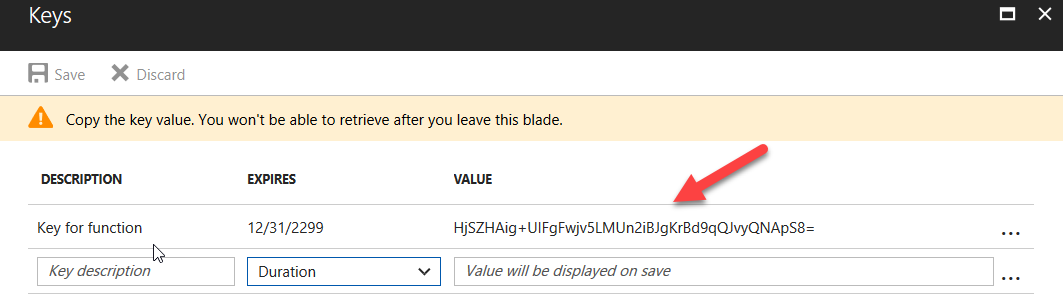
This value will be used later as the ClientSecret ("HjSZHAig+UIFgFwjv5LMUn2iBJgKrBd9qQJvyQNApS8=" in the example)
Key Vault Secrets creation
The Azure Key Vault allows to maintain certificates ("Keys") or value couples (name/value, "Secrets") in a centralized, encrypted way. To be able to use the Secrets, an application must be registered and known in Azure. The keys can be managed and monitored from the Azure Portal, and its framework allows access programmatically.
07 - Go back to the Azure Portal and create a Resource Group (or reuse an existing one)
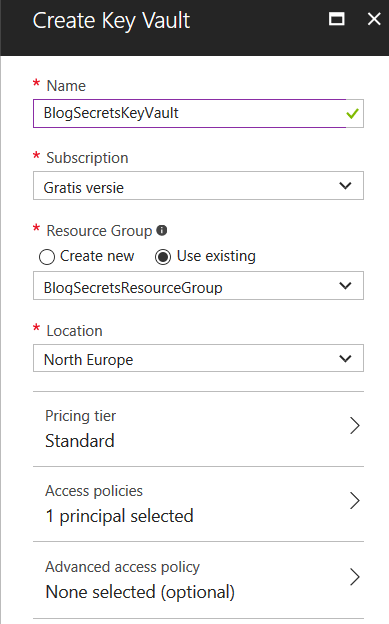
08 - In the Resource Group create a new "Key Vault". Assign it a name, select your subscription, resource group and location. Use the default "Pricing tier" (can be changed later if necessary), "Access policies" and "Advanced access policy"
09 - After creation, refresh the Resource Group window and click on the name of the created Key Vault

10 - Use the "Secrets" button and "+Add" a new Secret. Select "Manual" in the "Upload options", define a name for the couple and its value. Use the other options as they are by default
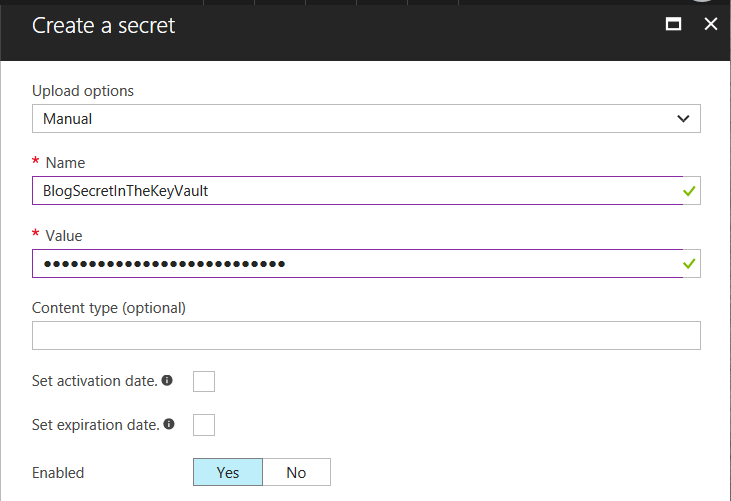
This couple "name/value" is the secret that the Key Vault will maintain encrypted and centralized for all applications that would require it
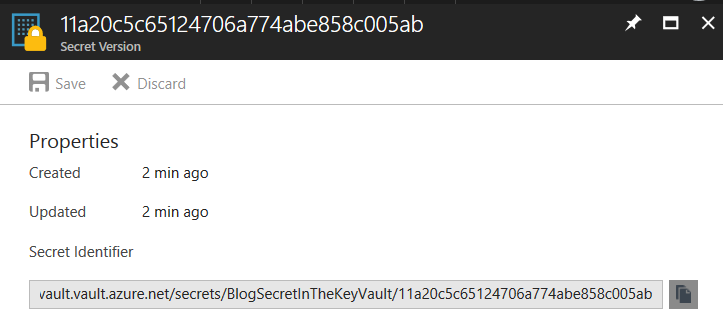
11 - After creation, refresh the list of Secrets and click on the just created secret. Click again on the "Version" (it should be only one at this moment, but you can create multiple versions if the secret changes). You can create also multiple Secrets in one Vault
12 - Copy the "Secret Identifier". This value will be used later as the SecretUri ("https://blogsecretskeyvault.vault.azure.net/secrets/BlogSecretInTheKeyVault/11a20c5c65124706a774abe858c005ab" in the example)
In the same window is possible to get an activation and expiration date for the Secret and to activate/deactivate it
13 - Go back to the main screen of the Key Vault. Use the "Principals" button. Add a new principal using the "+Add new" button. Click on "Select principal" and wait a couple of seconds: a list with all possible values is generated automatically. Select the Application Registration created in bullet 03
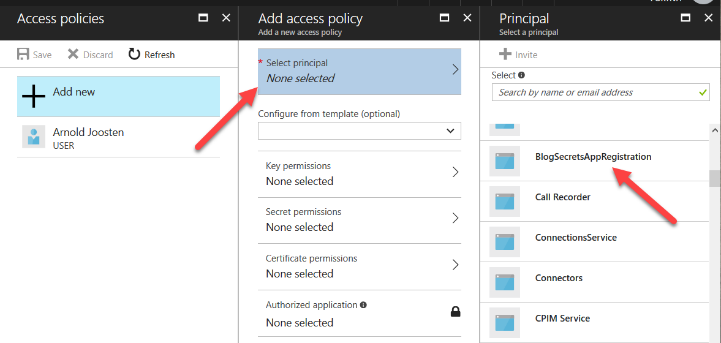
In the "Secret permissions" section select which operation will be allowed by the App Registration (only "Get" probably). Then use the "OK" button and "Save" the Principal
Create the Azure Function
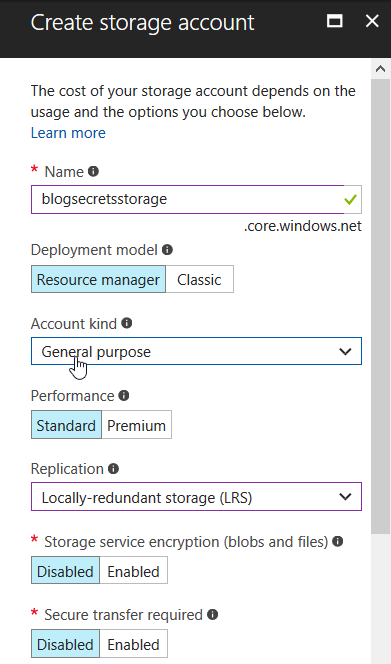
14 - Return to the Resource Group and add a new "Storage". Each Function App requires the use of an Azure Storage (it is possible to reuse an existing one). Define a name for the Storage and use all the default values further
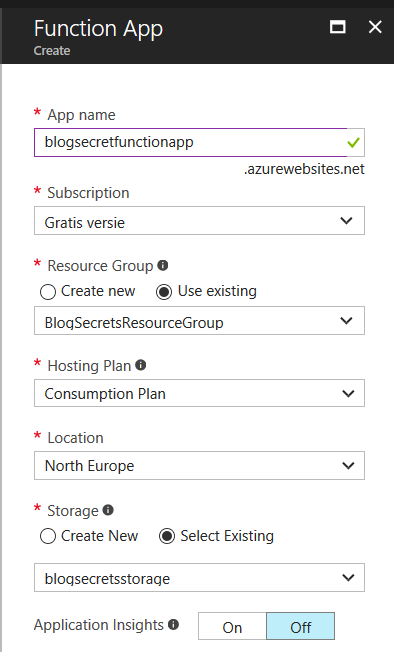
15 - Return to the Resource Group and create a new "Function App". A Function App is a repository for Functions. Assign a name for the App, select the subscription and Resource Group. Select "Consumption Plan" in the "Hosting Plan" and select the Location of your Azure Data Center. In "Storage" use "Select Existing" and select the Storage created in point 14
16 - After creation of the Function App, return to the main window of the Resource Group, refresh the screen and click on the name of the created Function App
17 - From the Function App screen, click on "Custom function"
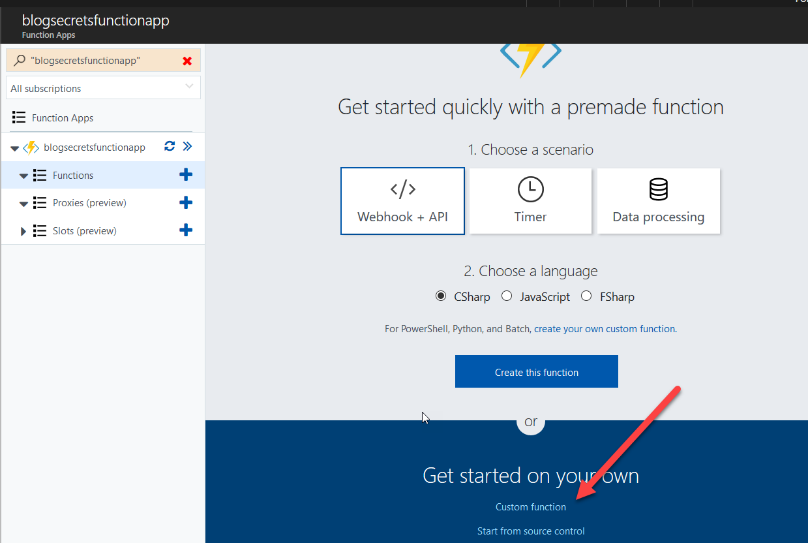
In the following screen select "C#" and "TimerTrigger-CSharp". Define a name for the Function ("BlogSecrectManualTriggerCSharpFunction" in the example) and a schedule
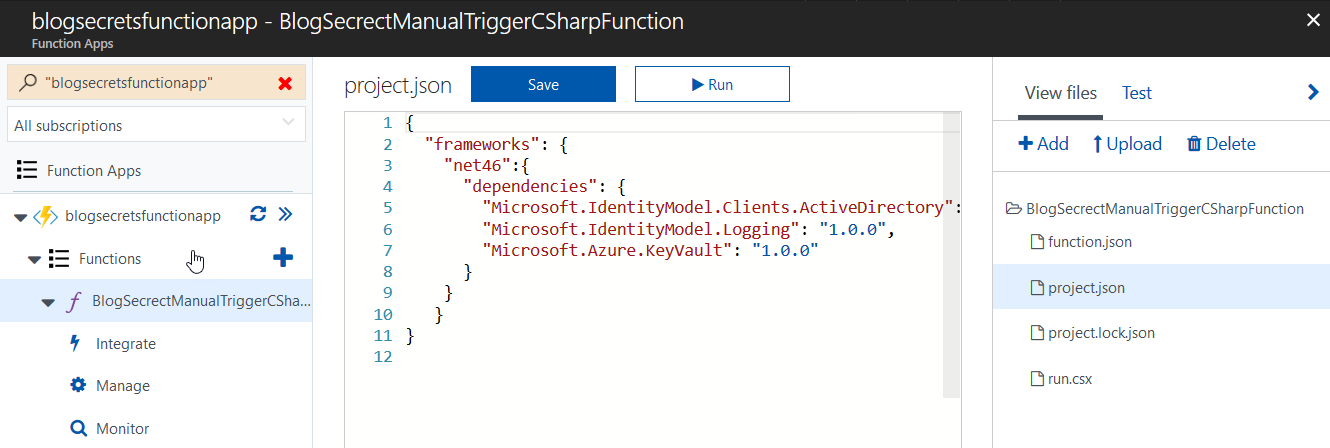
18 - First is necessary to add the NuGets that take care of having the required dlls and references. Using the button "View files" at the right side of the window, use the "+Add" button to create a new file and call it "project.json" (this name is obligatory)
19 - In the editor of "project.json" add the following lines to download and register the NuGets:
{
"frameworks": {
"net46":{
"dependencies": {
"Microsoft.IdentityModel.Clients.ActiveDirectory": "3.13.1",
"Microsoft.IdentityModel.Logging": "1.0.0",
"Microsoft.Azure.KeyVault": "1.0.0"
}
}
}
}
Save the file
20 - Select the file "run.csx" and replace the original code with the following:
using System;
using System.Security;
using Microsoft.IdentityModel.Clients.ActiveDirectory;
using System.Threading.Tasks;
using Microsoft.Azure.KeyVault;
public static void Run(TimerInfo myTimer, TraceWriter log)
{
log.Info($”C# function started at: {DateTime.Now}”);
string secPwInKeyVault = GetSecret();
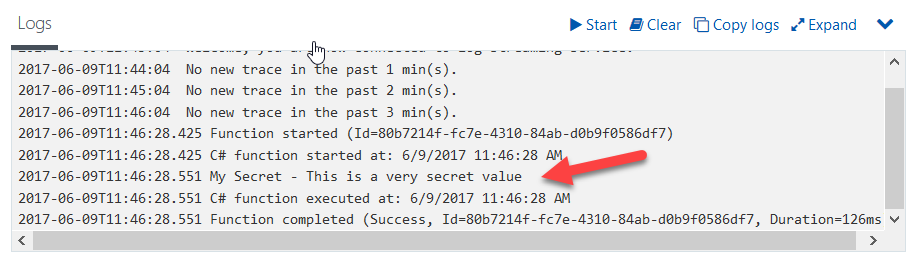
log.Info(“My Secret – ” + secPwInKeyVault);
log.Info($”C# function executed at: {DateTime.Now}”);
}
public static string GetSecret()
{
string SecretUri = “https://blogsecretskeyvault.vault.azure.net/secrets/BlogSecretInTheKeyVault/11a20c5c65134706a774abe858c005ab”;
var kvToken = new KeyVaultClient(new KeyVaultClient.AuthenticationCallback(GetToken));
var kvSecret = kvToken.GetSecretAsync(SecretUri).Result;
return kvSecret.Value;
}
public static async Task<string> GetToken(string authority, string resource, string scope)
{
string ClientId = “33b6cafa-64da-4da8-8d54-ee349a16e7c5”;
string ClientSecret = “HjSZJAig+UIFgFwjv5LMUn2iBJgKrBd9qQJvyQNApS8=”;
var authContext = new AuthenticationContext(authority);
ClientCredential clientCred = new ClientCredential(ClientId, ClientSecret);
AuthenticationResult authResult = await authContext.AcquireTokenAsync(resource, clientCred);
if (authResult == null)
throw new InvalidOperationException(“Failed to obtain the JWT token”);
return authResult.AccessToken;
}
Replace the "SecretUri" variable value with the value from step 12. Replace the "ClientId" value with the value found in step 05. The value of the "ClientSecret" is the value found in step 06.
The Function has two methods: "GetToken()" that uses the Azure App Registration to get an authorization token from AD, and "GetSecret()" that uses the token to approach the Key Vault Secret (using his URL) to get the secret. The main function "Run()" needs to call only the "GetSecret()" to find the encrypted value in the Key Vault.
Save and run the Function:
Gustavo Velez
MVP Microsoft Office Servers and Services

